
Spec Miata … Wreck Piñata, same difference. 😉
Over the past few months, a lot has been learned about the venerable Piñata and aftermarket seats. While there are several aftermarket companies selling seat bases for the Piñata, a precious few fit the car with enough room to accommodate an average American (read: taller than 5′ 7″ and weighing more than 140#).
Some things to know about race seats are that the majority of them only offer side-position mounts for adjust-ability in the installation. Side-mount seats then require side-rails to attach the seat to a base or the floor. The seats used in this installation are one of the few that offers side and bottom-position mounts. While this sounds like a good thing, these seats tend to be the low-end, tubular steel frame instead of a fiberglass or carbon fibre shell with the bottom mounts included for direct mounting of sliders.
What is the advantage of a side-mount? Keep in mind that a race seat is a molded shell with no angle adjustment. Most seats are built with a 15 degree angle but that is with the bottom completely flat. Depending on the driver and the vehicle, a greater angle may be required to fit a tall driver or less angle to fit a short driver. With a bottom mount, the seat is merely flat with no adjust-ability while with a side mount, the seat can be angled accordingly. The downside to a side mount in a tight cockpit is that it keeps the seat about an inch above the seat base. Unfortunately with seat installations, there are almost always compromises.
Now to the installation process…
First and foremost – ask yourself if you want/need the seat to be on sliders. This allows fore/aft movement of the seat BUT it also adds approximately 1″ in height to the seat base. In other words, if you fit in the seat with less than 1″ between your helmet and the roof, with a slider, you’ll be jammed against the roof without any breathing room. There are ways to accommodate a slider into the mounting system but the amount of effort is greater than just turning a few wrenches.
Next and equally important is the distance between the pedals and the seat back. Depending on personal preference, the seat back angle may be increased to provide more “lean”. The bigger concern is not just to reach the pedals but to provide sufficient clearance for the driver’s legs to NOT get caught in the steering wheel’s plane.

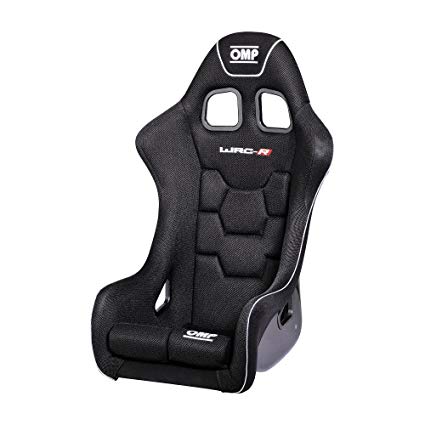
Be aware that some seats (Sparco Sprint (above) comes to mind) are designed in such a manner that the driver’s legs are permanently elevated while other seats (Sparco Evo and OMP WRC – below) have a flat bottom that is supplemented by cushions.
Lastly is the steering wheel – yes, the steering wheel. While it isn’t part of the installation, it’s location is critical to the seat installation. While a driver may fit the seat beautifully, his/her legs can get caught entering and exiting the car due to the steering wheel. Worse, the driver’s knees may hit the wheel, hindering their ability to operate the foot pedals. The fixes aren’t difficult – for ingress/egress – a removable steering wheel and for clearance – a spacer.
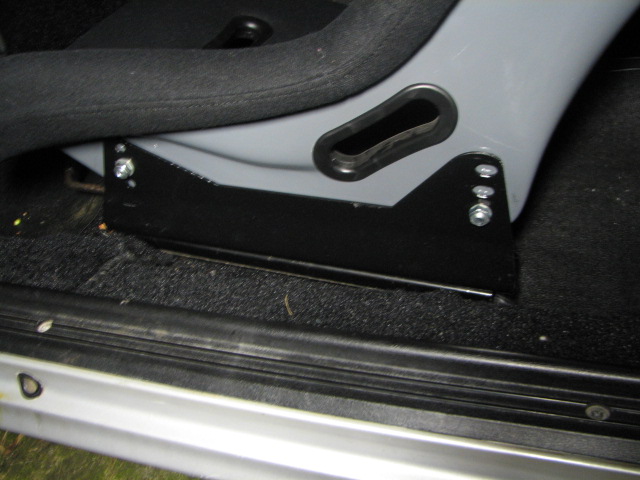
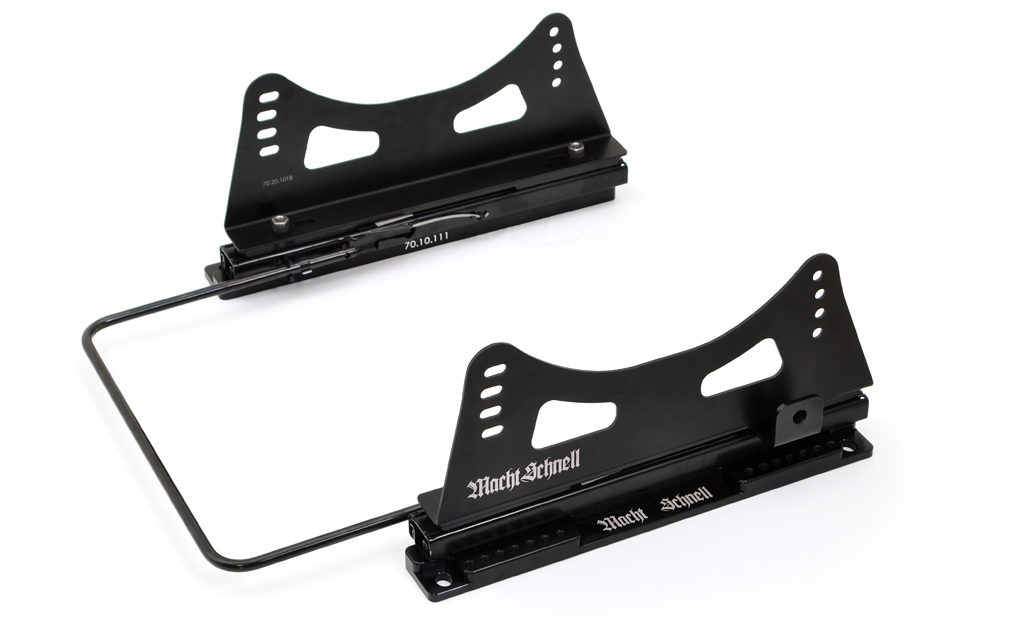
The first attempt at installing race seats has been only marginally successful. This involves using Planted seat bases and OMP’s HTE-R seats. In theory, the bases are a bolt-in designed to fit sliders to provide a more universal fit. Unfortunately, sliders weren’t considered due to the added height that compromises the already limited cabin space of a Piñata. Instead, the installation used side mounts and Planted bases.
The first installation involved bolting the side mounts to the seat, setting the seat as low as possible to provide maximum head room (read: front and rear points using the lowest positions on the side mounts). Then the side mounts were bolted to the seat base and the seat base was bolted to the car. While all the seat and seat mount bolts mated up, the seat base points were a different story. Repeatedly it was discovered that 3 of the 4 mounting points fit perfectly BUT the 4th point was perpetually off by roughly ¼”. We later discovered that this could be overcome by STANDING on the seat base in order to flatten it out enough to get all the bolts to start smoothly.
The results of the first installation were a seat that was virtually impossible to enter/exit with the steering wheel installed AND anyone over 5′ tall was jammed into the roof – clearly NOT an acceptable installation. Upon a visual inspection, the seat base was lower at the back so we removed the side mounts from the base and moved them as far back as possible, effectively placing the top of the seat back almost against the rollbar. The position was noted on the seat base and new mounting holes were drilled into the seat base.
The second installation was marginally workable although the seat required the removal of the bottom cushion in order to provide necessary head room. Head room was still at a premium and while leg room was acceptable, the steering wheel (aftermarket with a Momo adapter) was too close to the dashboard to allow the driver to operate the clutch or easily move from the accelerator to the brake.
Fortunately for Steve F and Jordan, Harry B was generous enough to allow them to use his passenger seat as their driver’s seat. Harry’s installation is custom and quite useful. It incorporates a very thin-shell seat that has virtually no rise for the seat bottom with sliders that also act as a seat base. The result is a seat that offers good headroom AND fore/aft adjust-ability. From an ease of installation standpoint, this is certainly a winner!!
More to come, stay tuned for more “Project Wreck Piñata” updates.


