
Bill Nye says: “Asphalt, also known as bitumen is a sticky, black and highly viscous liquid or semi-solid form of petroleum…” — great, now that we’ve established a base-line let’s talk about how to preserve asphalt and your pocketbook.
We all need to perform basic maintenance, tire rotation, brake bleeds, etc. However on those hot days in the spring/summer, asphalt can become quite soft, especially on recently paved driveways or paddocks. It doesn’t take much for the weight of the car to begin to dig-in to the pavement.
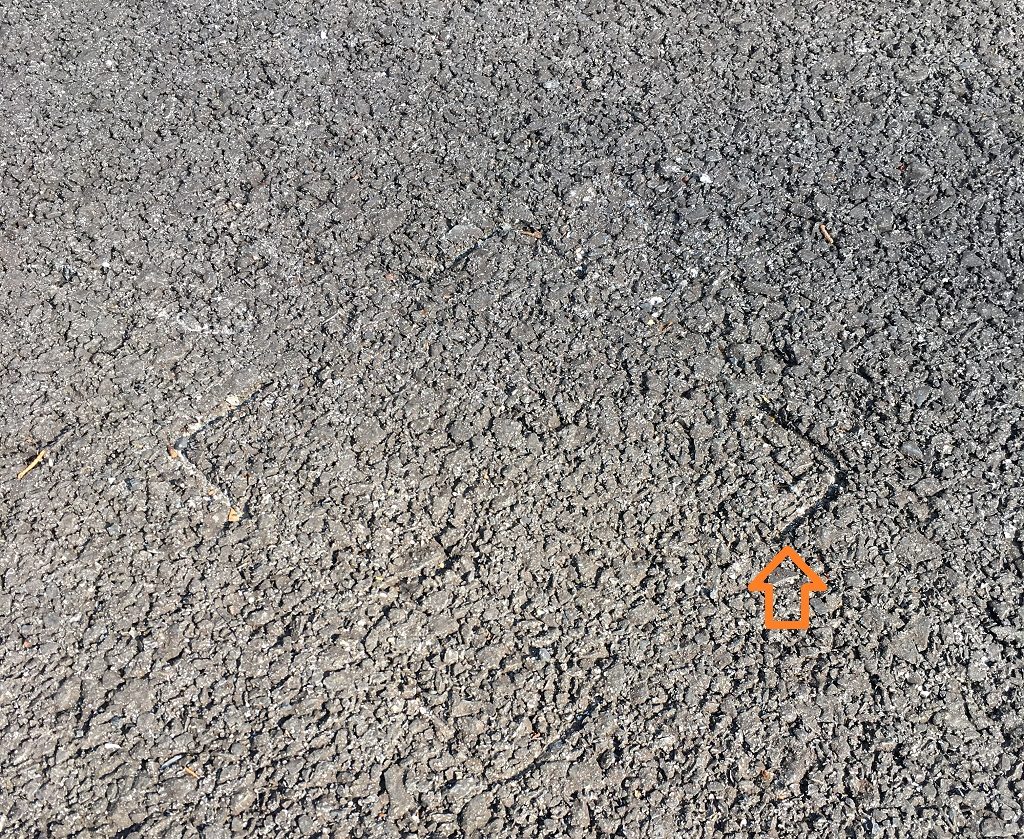
Some might argue, “who cares” – but more and more tracks on the East Coast are seeing re-paves including their paddocks. These repaves aren’t cheap, and many of the facilities are patrolling how folks are “abusing” their fresh asphalt and are issuing fines to drivers. For example: Virginia International Raceway (VIR).
The opposite is also true, some tracks haven’t invested in paved paddocks will have paddocks that are gravel based or sandy/soft. Having a non-paved surface to work on means your jack stands will dig in or sink. Venues like: NJMP and Palmer Motorsports Park.
Alas … what is an enterprising DIY’er supposed to do?
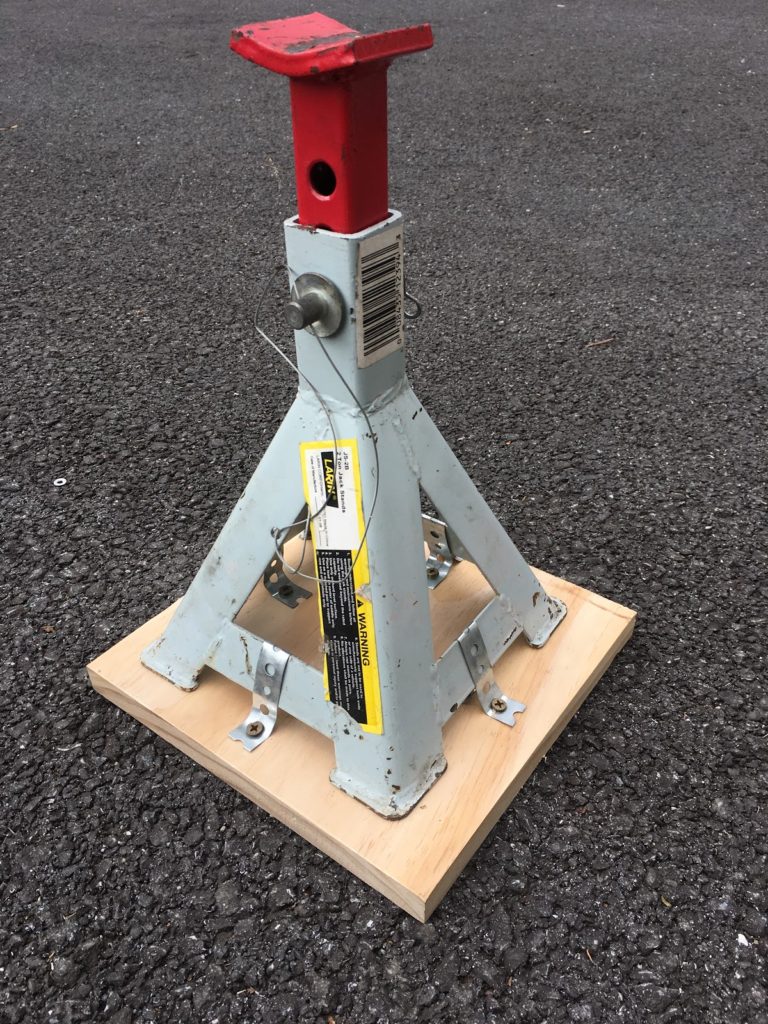
Well, the boffins here at GTM have a solution for you — JACK STAND BASES!
This DIY will require a quick trip to your local Lowes, Home Depot, or whatever local hardware store you frequent for some supplies. We’ll provide you with a shopping list, so that you only have to make ONE trip. As well as a step-by-step guide.
Items Required
- Using 8-inch wide based jackstands, a 1” x 10” x 48” SOLID Pine Board – *do not* use glued slat board, composite, engineered or particle board. Adjust your board size to accommodate larger stands. We recommend a 1-inch border around the base of the stand. (see Step 1)
- EIGHT – ½-inch wood screws per Base.
- Metal (Galvanized) or Plastic Plumbers Strap
Tools Required
- T-square
- Pencil or Sharpie
- Screwdriver (or Screw Gun)
- A wood Saw (circular, cut-off, sawzall, etc)
- Wood file (or grinding wheel)
- Tin Snips
- Tape Measure
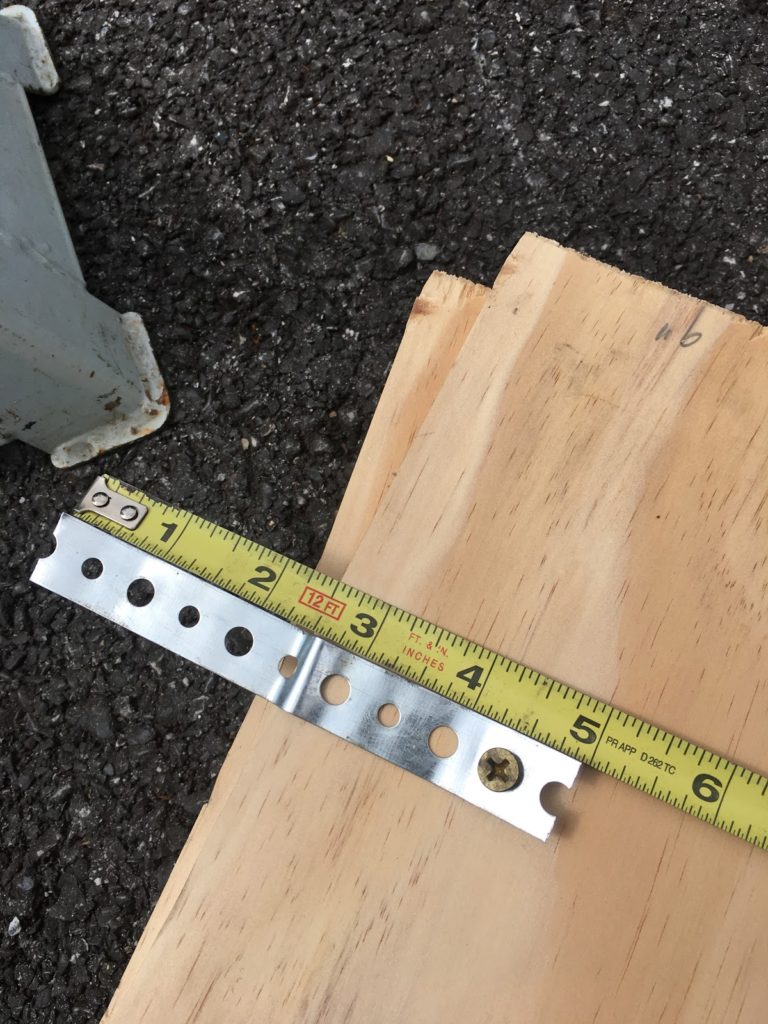
Step 1: Prep & Measure your Bases.
Depending on the size of your your jackstands, you should measure off a base plate size that allows a 1-inch border around the feet of the jack stand.
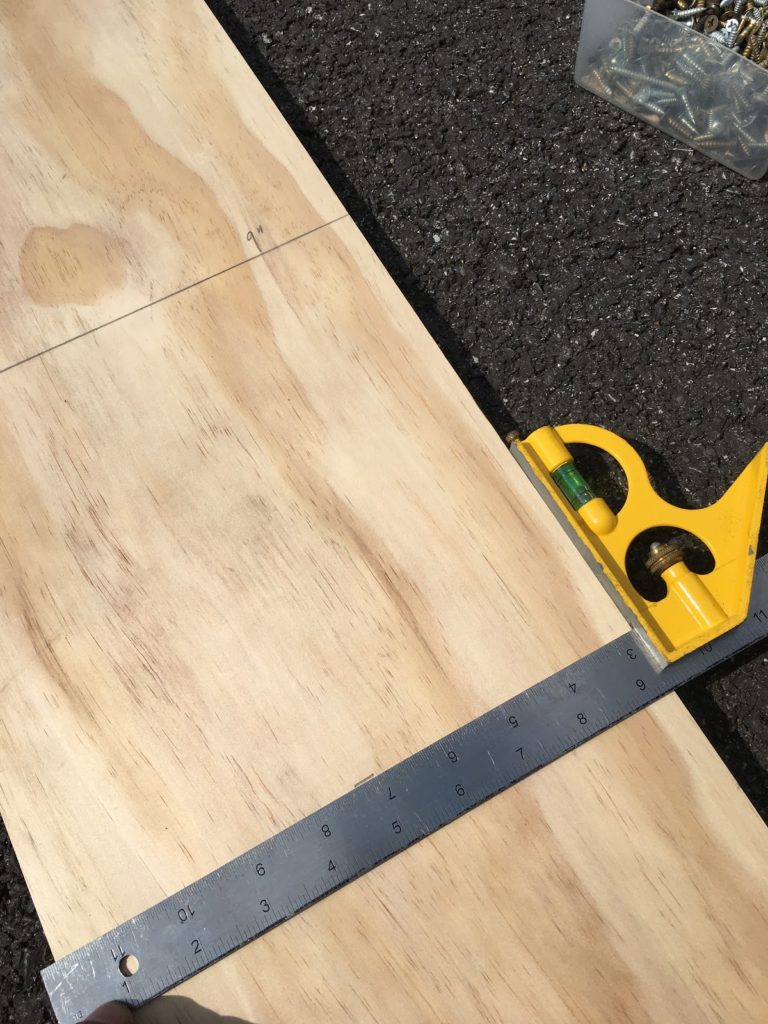
Use your t-square to mark off the cutting areas, the case of our jackstands (8-inch) we’ll be using 9” square bases.
Step 2: Measure Twice – Cut Once
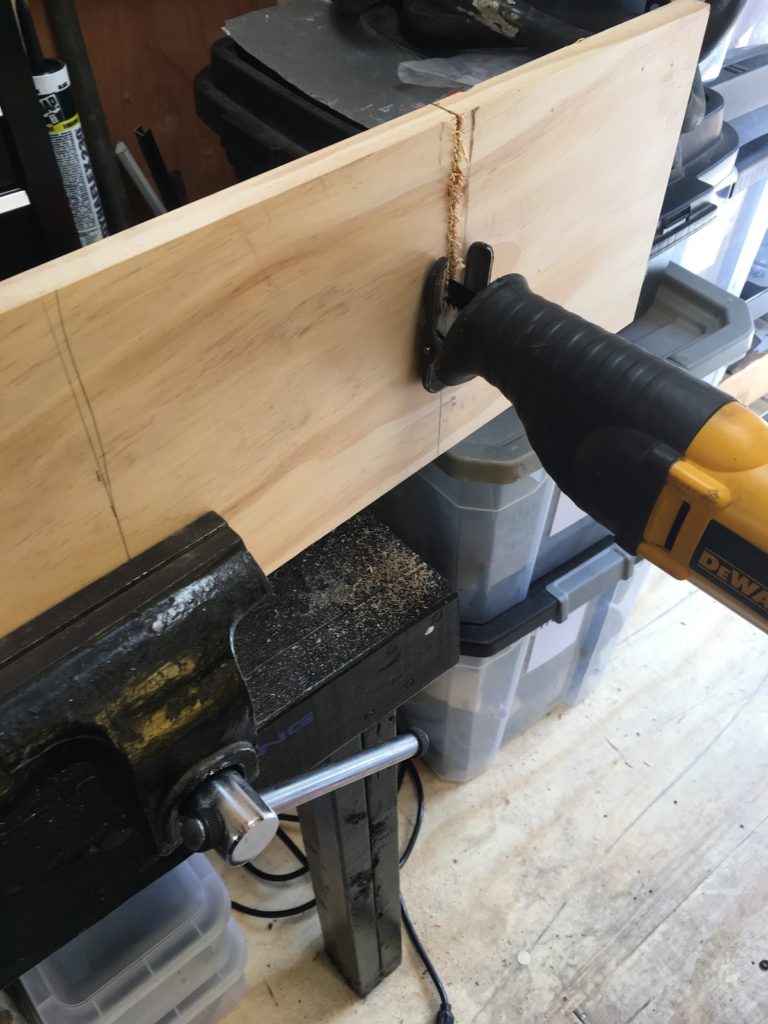
Using something to secure the wooden plank (ie: vice), use your cutting tool of choice: table saw, circular saw … or in our case, our favorite… the SAWZALL! Double check your measurements before you start your cuts. Always remember to wear eye protection before starting your cuts.
Step 3: Clean up the Rough Edges
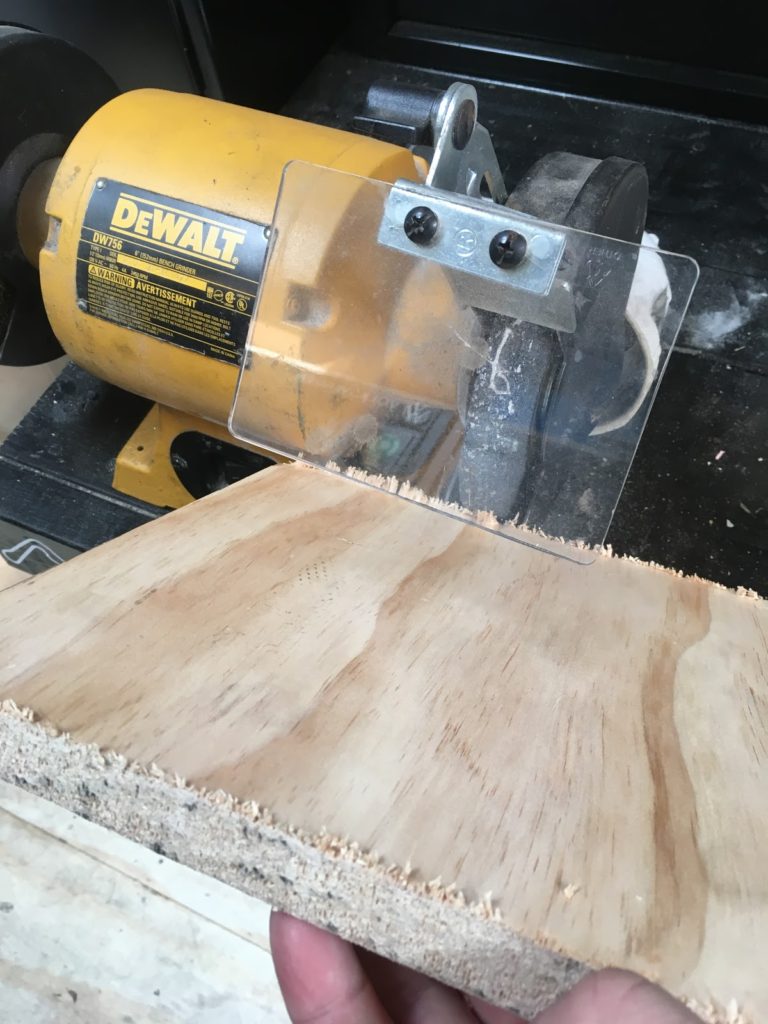
Using a bench grinder, cut off wheel, hand-file, etc. smooth off the rough edges of your base plate. No one wants to get a splinter from a rough edge! Always remember to wear eye protection before performing this task.
Step 4: Setup your straps

Align the stand with your new base, and mark where you want to screw down the straps to secure the stand to the pad. Use the pencil (or sharpie) to make a mark, or press into the wood to create a divot (with a pencil or [drill] punch).
Step 5: Create the Securing Straps
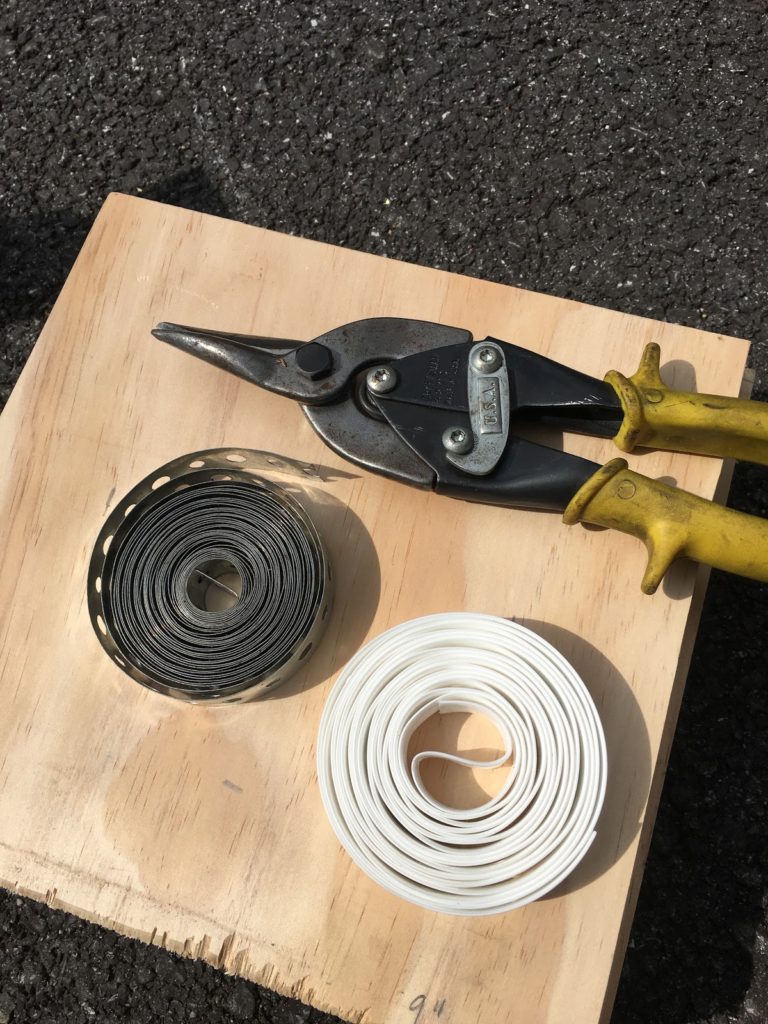
Use can use either Metal (Galvanized) or Plastic Plumbers strap, we recommend Metal, but be mindful of the effects of weather on the metal. You *might* have to replace the straps in a few seasons. Plastic is great, but it doesn’t conform as well to the shape of the jack stand. Either type works well, it’s your call. Using your tin snips, cut the strap into 5-inch segments. Note: we are using the smaller holes for our screws. (seen below).
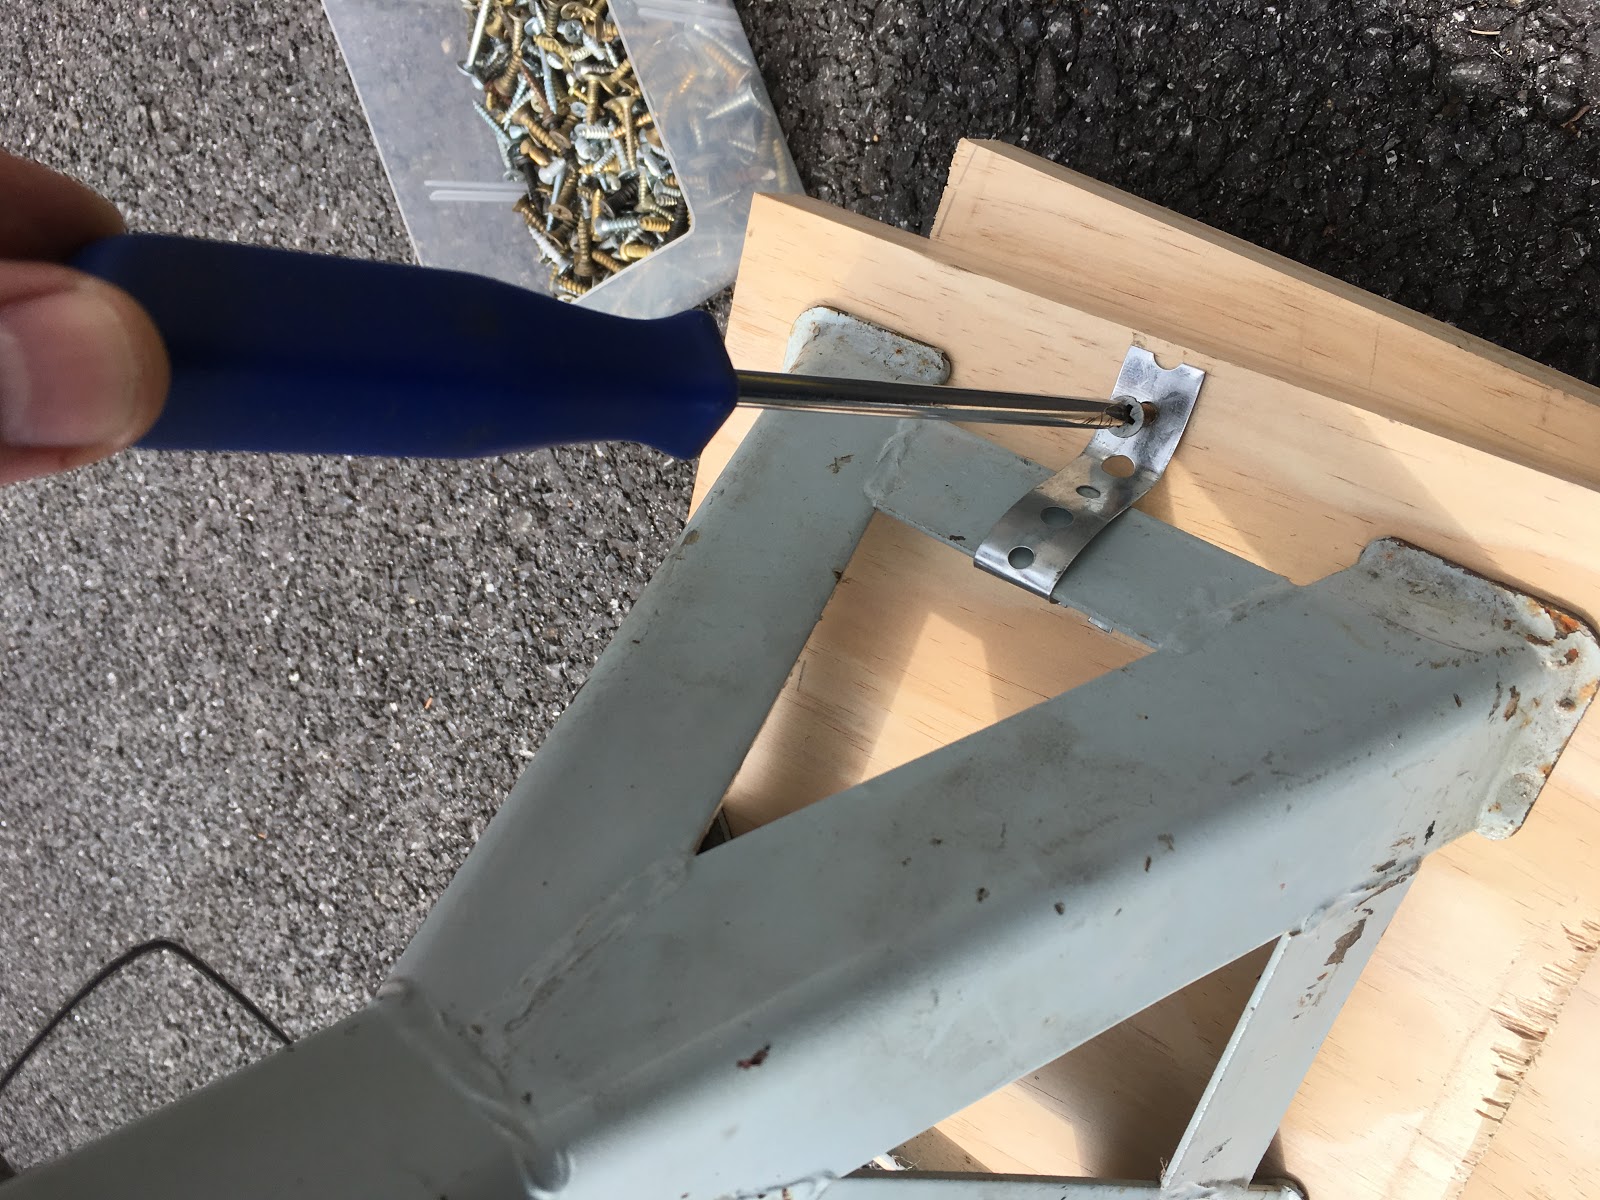
Step 6: Prepare the straps for the jackstand.
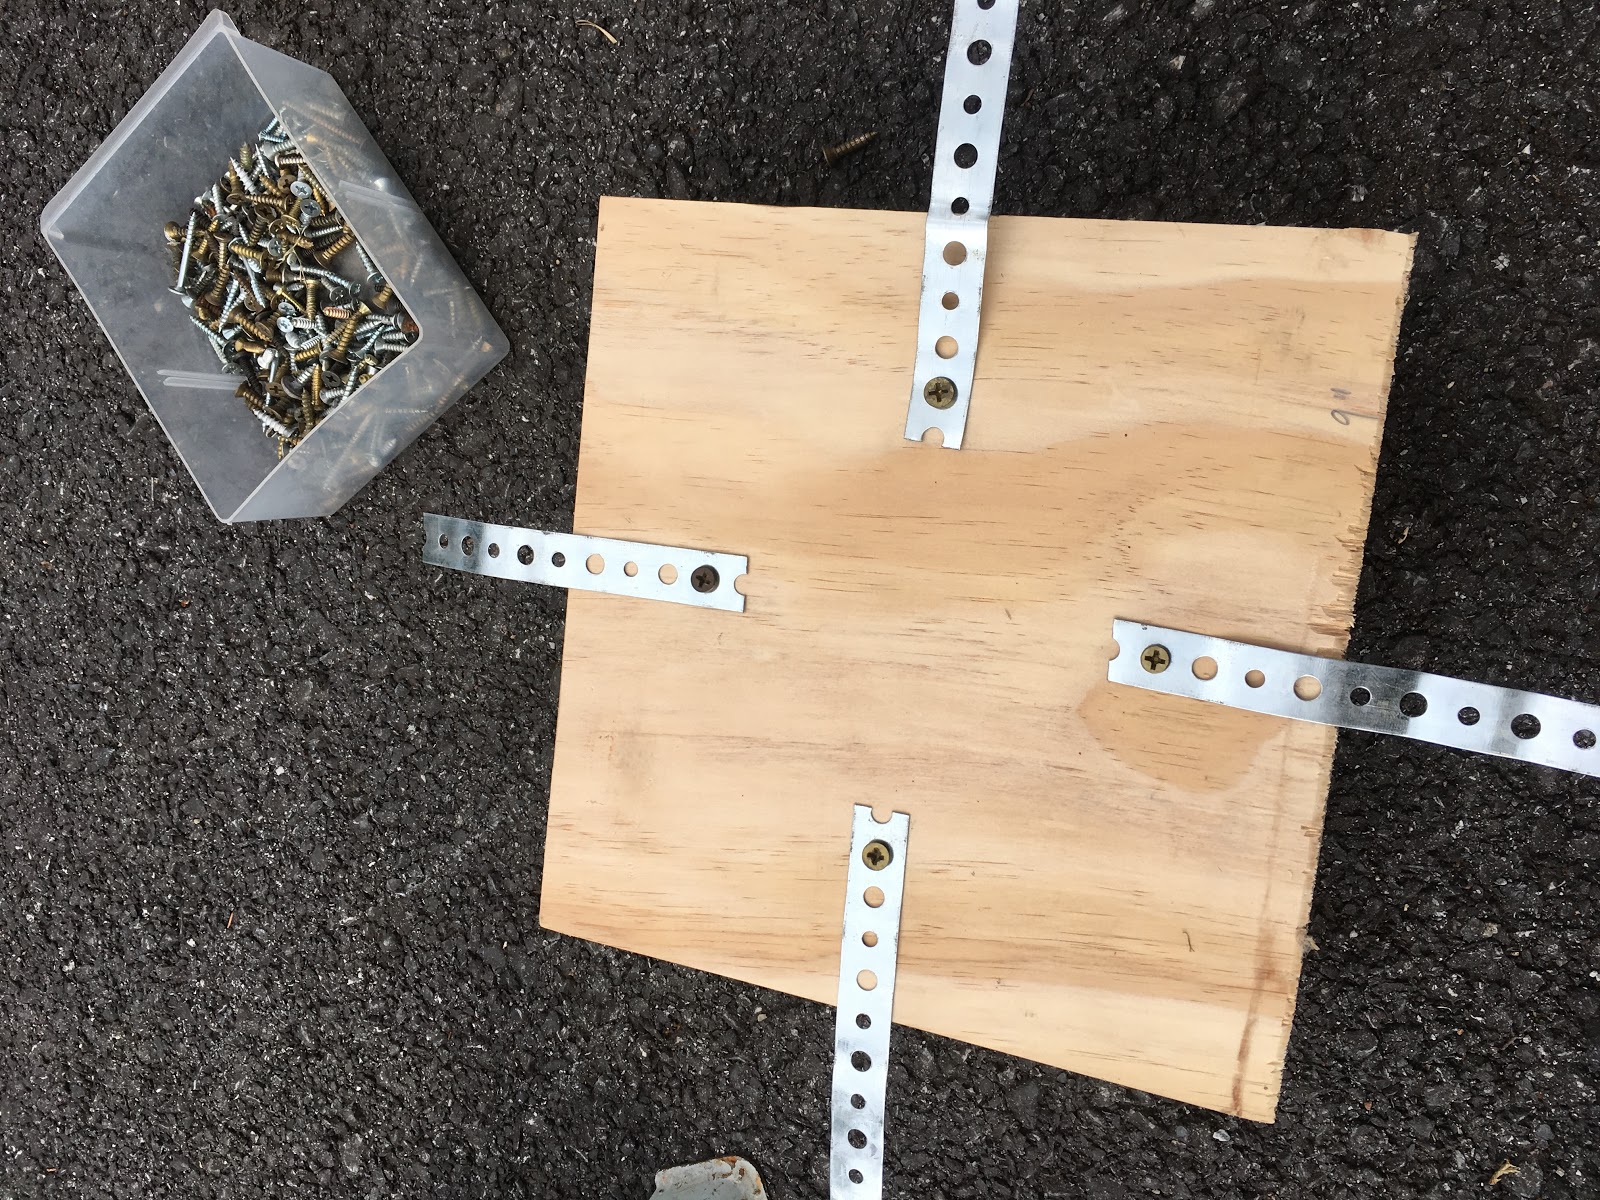
Using the ½-inch screws you purchased, affix all of the straps to the four locations you marked in Step 4. Bend the straps upwards so that the jack stand will fit over them.
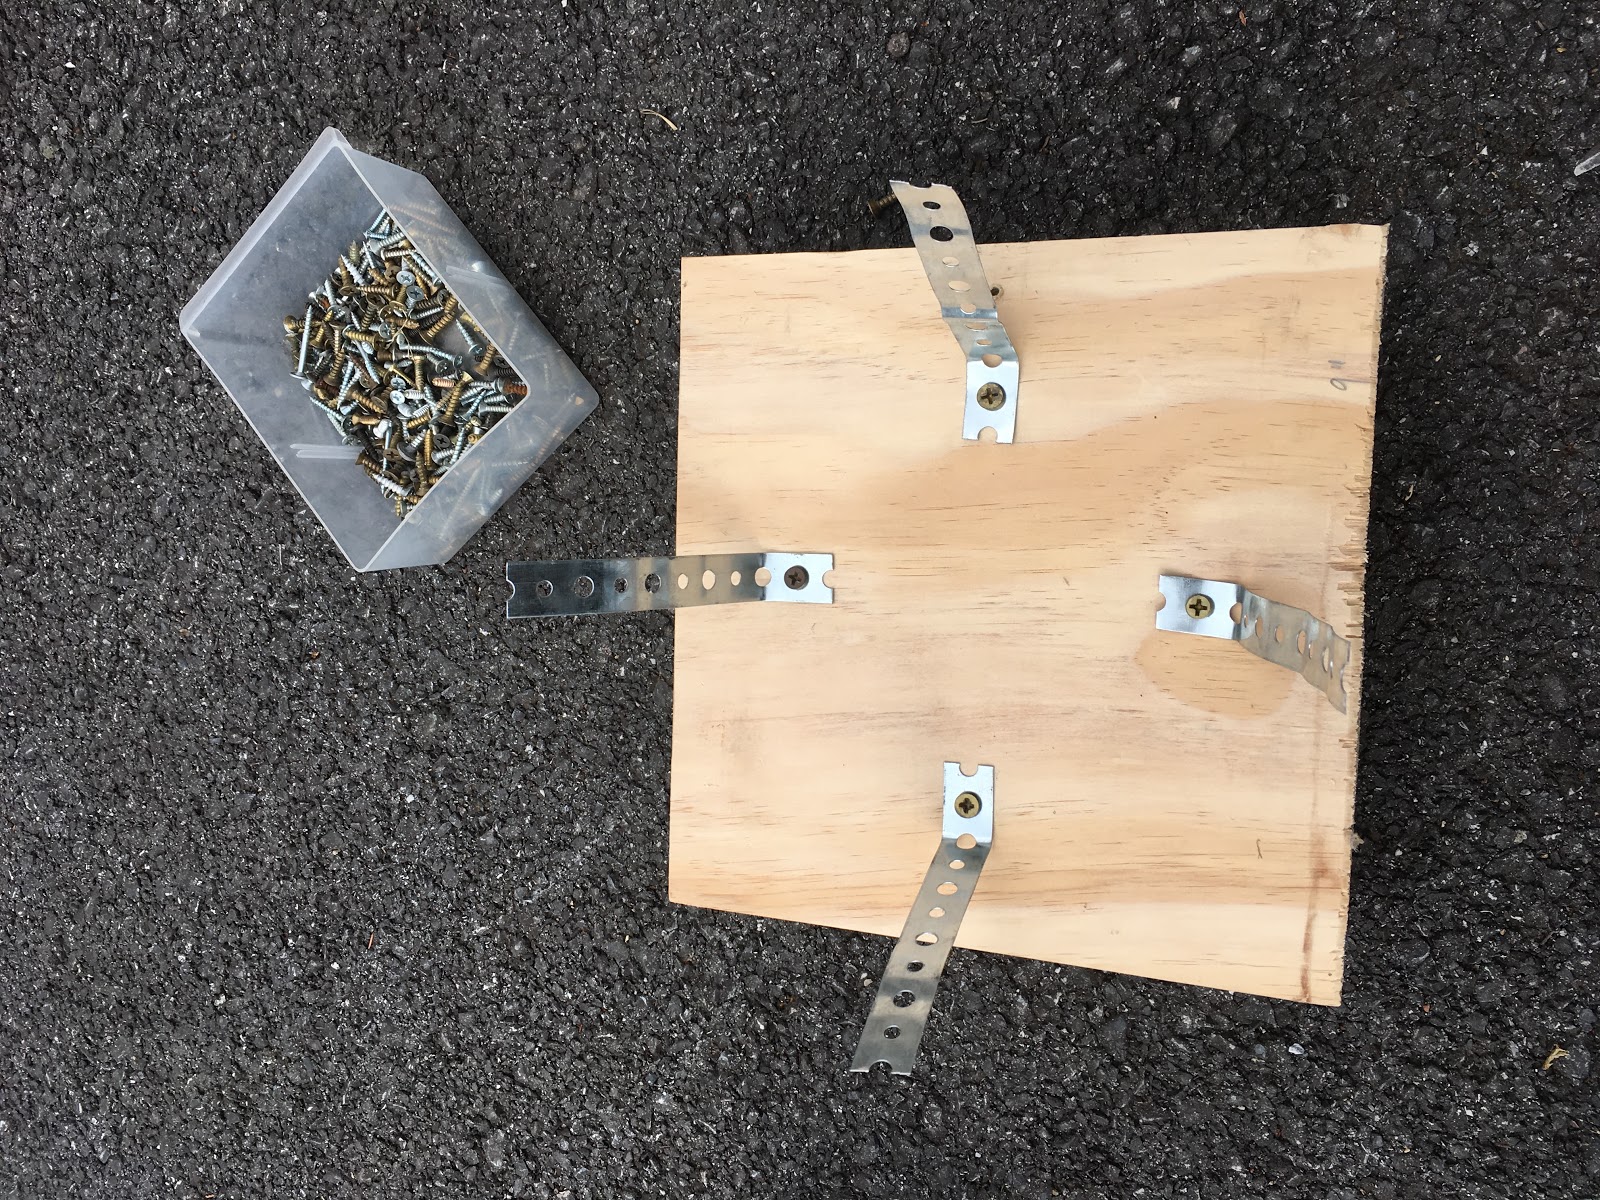
Place the jack stand over the straps and onto the base. Fold the straps over, then screw down.
Step 7: Gettin’ Fancy!
Note that the wood we chose is NOT weatherproof or pressure treated, but it is solid (not glued planks or particle board). Some folks maybe choose to lather-rinse-repeat Steps 4-6 for a complete set of jackstands (usually 2 or 4). We however want to protect our wood from moisture, which will require us to paint / treat them.
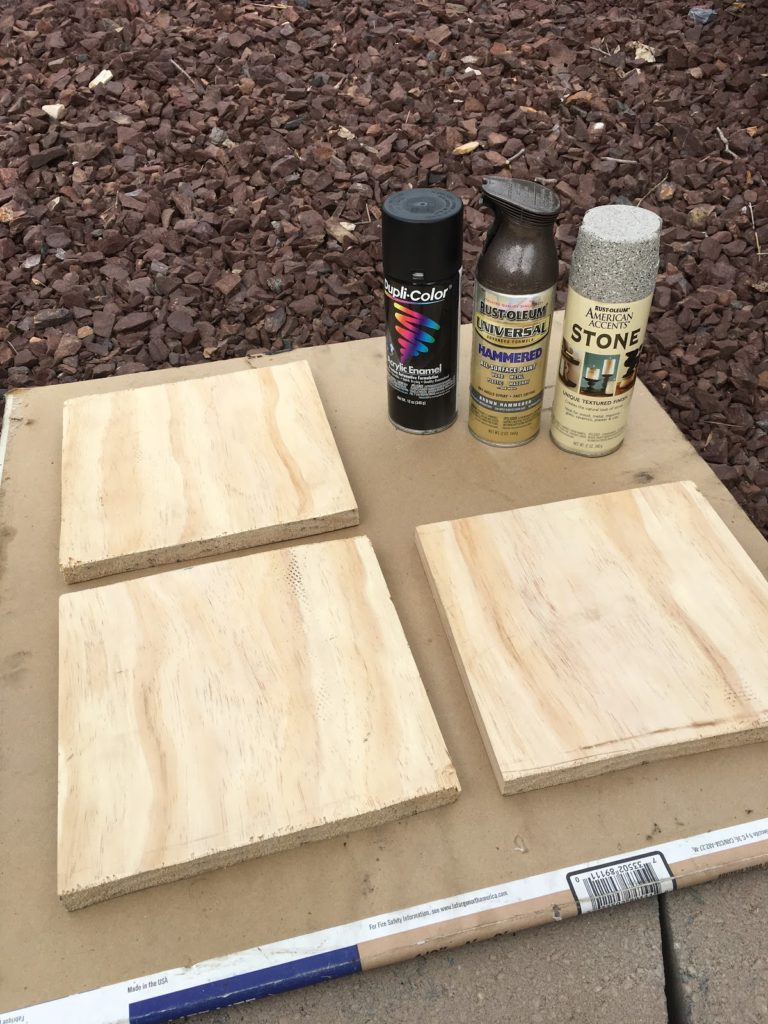
Instead of using polyurethane or stains (which you can opt to do for a really classy effect); choose either an oil-based enamel paint or some sort of outdoor paint. Some examples are shown above.
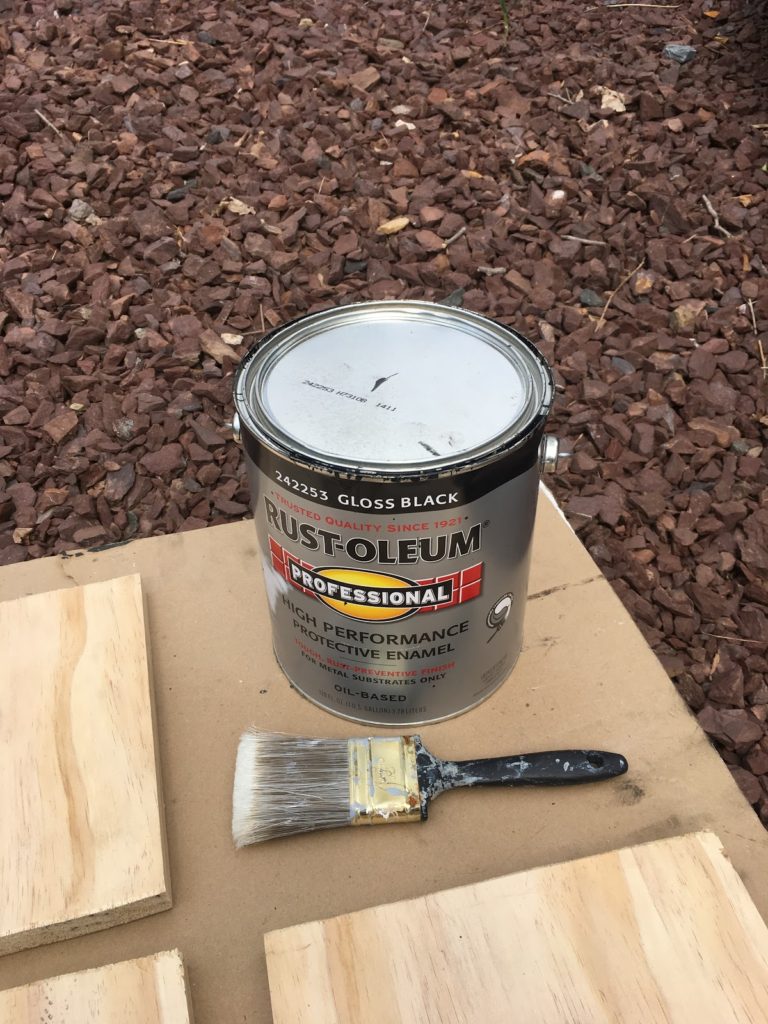
Since we’re a little bit more over-the-top at GTM, we choose to use BLACK brushable rustoleum. Rustoleum is oil-based enamel and soaks into the wood easily. It takes much longer to dry than rattle-can paints. But the high gloss finish is beautiful and weatherproof.
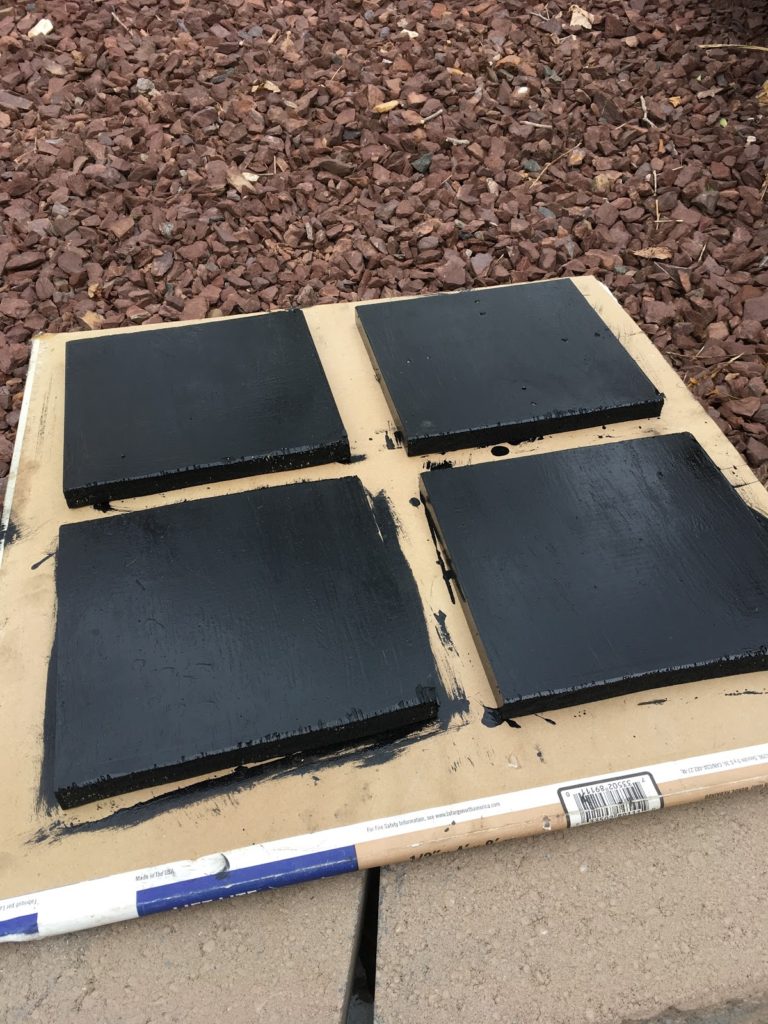
Many hours later, our bases are dry. On average it takes about 3 hrs for this type of paint to dry, always remember to paint outdoors or in well ventilated areas. It should only take one thick coat to seal the wood, but multiple rounds to cover the top and bottom. Pro Tip: paint the edges first, you’ll get less runs and it won’t stick to your painting surface. After painting is done, return to Step 4 to complete your project.
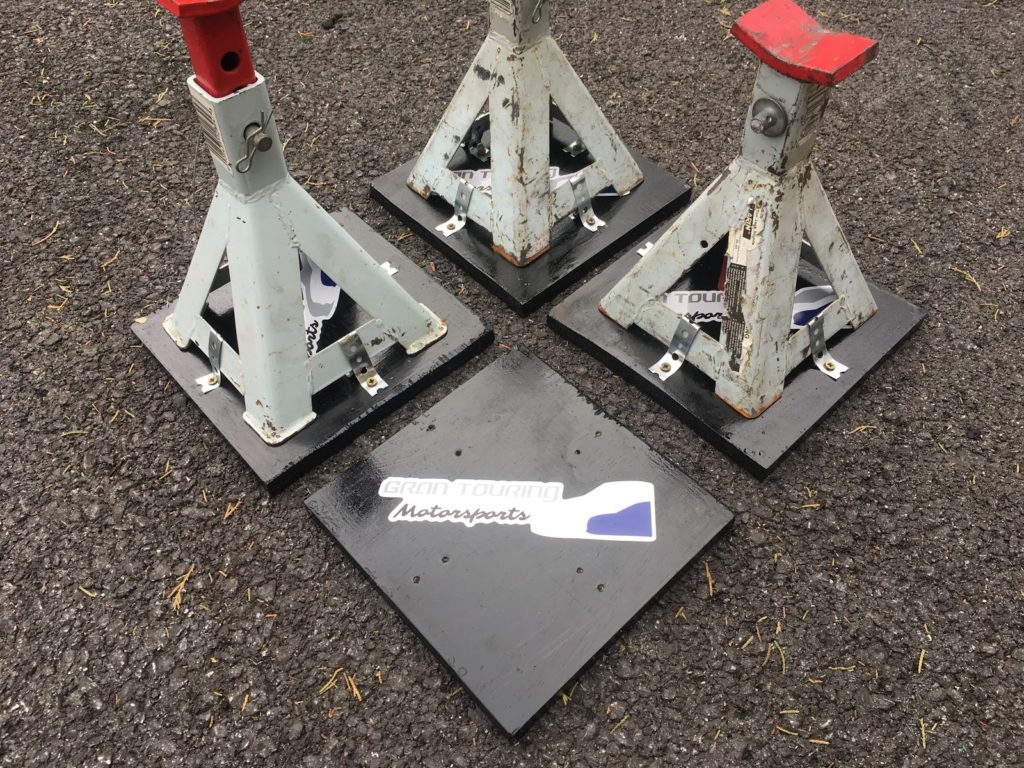
FINISHED PRODUCT
Interested in a set of Jackstand Pads? — but not handy or don’t have all the tools? No problem! We at GTM can help. If you provide your own jack stands (and measurements) we can build a set of pads for $40 for up to 4 stands. (all proceeds go to the Club) – if you need a set of jack stands, prices will vary based on price and availability. Order a set today from the GTM Store.
Enjoy your new stands, your driveway will thank you!


